The Apache Web Server is one of the most widely deployed web servers around the world. There are new and powerful alternatives you may have heard of, such as NGINX which seems to be the coolest thing around lately.
There are meaningful differences between the two. Both are great but for example Apache has set the bar first and that shows when you have to install any piece of software that has to play with it, since integration with Apache is something everyone takes for granted. Apache does also understand dynamic content. NGINX just plays static content out of the box. And many modern websites and CMS’s do use dynamic content. Obviously NGINX can play dynamic content after installing the appropriate software. PHP-FPM is a program that enables that functionality in NGINX. Mind this can be also installed on Apache. NGINX can also play other roles such as acting as a reverse proxy server or as a load balancer.
If you find the articles in Adminbyaccident.com useful to you, please consider making a donation.
Use this link to get $200 credit at DigitalOcean and support Adminbyaccident.com costs.
Get $100 credit for free at Vultr using this link and support Adminbyaccident.com costs.
Mind Vultr supports FreeBSD on their VPS offer.
Competition between the two is good and healthy for the web. And basically you can assume Apache is better documented and easier to configure. NGINX is now very popular and widely deployed but it is not as easy to tune for the newbie although things have improved dramatically lately and now the two seem to be head to head. Which is good for users after all.
To start playing with a web server, which will often be accompanied by WordPress, we’ll use Apache. Mind there are some WordPress plugins which expect certain things as default. That default means for example writing to a file called .htaccess. If you want to set pretty permalinks in WordPress you need that file or configure NGINX propperly to allow rewrites. That will allow you to have your own special crafted url. Instead of reading numbers and symbols in the url next to your domain, you can now put posts out to the world which have a human readable url. And the search engines spyders do also like it and your SEO strategy is a bit better. This doesn’t mean you can’t play WordPress on NGINX.
URL example with a numeric identifier instead of words:

An URL example with words (which is supposed to be more SEO friendly):

The NGINX team do also have their way and they say on a very nice explanatory article that “If you need .htacces, you’re probably doing it wrong”. As you can see this is a different mindset from what has been developed for many years. A rule of thumb to choose in between Apache and NGINX is: “First learn Apache. Once you fully understand it go and learn NGINX”. Afterwards your toolset is wider, your understanding more complete and you can take the best tool for the job at each time.

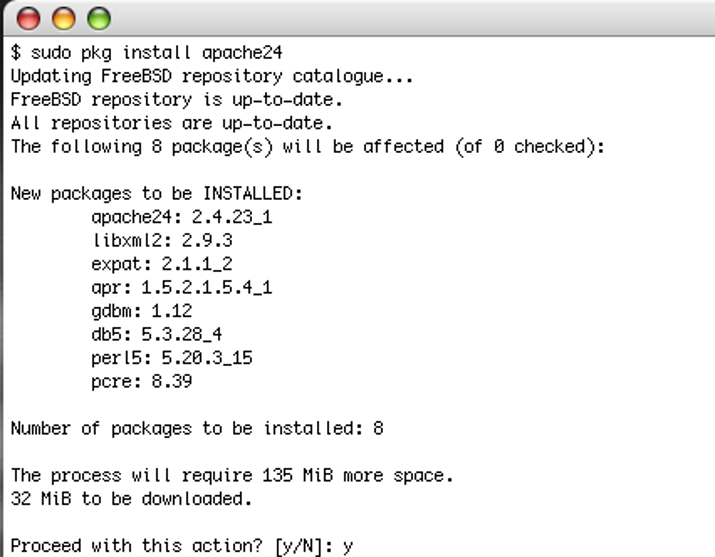
As you can read in the picture above we’ll install apache by typing:
sudo pkg install apache24
Now we’ll set apache to start at boot time by editing the /etc/rc.conf file.
sudo vi /etc/rc.conf
At the bottom of the file add:
apache24_enable="YES"
Time to start the service so the web server is working. Type the following:
sudo service apache24 onestart
Now go to your web browser and point it to the url or ip address your server sits on. You should see a message like:

If you don’t see the message “It works”, Apache isn’t working. Check the installation messages to find any errors or problems you may have missed.
Configure Apache as a backend web server
Apache is listening to port 80 by default. As almost any webserver since this is the default port for http requests. If you pretend to use Apache and you will not put any proxy server in front or any other program as an http accelerator you don’t need to change this.
Since some people will install Varnish, an http accelerator, or will put a reverse proxy in front of the Apache instance such as NGINX, we will change the port Apache is listening to. Instead of 80 we’ll set 8080 in this case.
sudo vi /usr/local/etc/apache24/httpd.conf
Listen 8080
Servername ipnumber or localhost:8080
Launch Apache
sudo service apache24 start
If you visit the webserver ip you should see the “It works” message as before.
If you find the articles in Adminbyaccident.com useful to you, please consider making a donation.
Use this link to get $200 credit at DigitalOcean and support Adminbyaccident.com costs.
Get $100 credit for free at Vultr using this link and support Adminbyaccident.com costs.
Mind Vultr supports FreeBSD on their VPS offer.