
On this guide you will read about a simple way to enable Apache’s TLS connections on your web server. Aside from useful it secures the connection from the client to the server and prevents unwanted tinkering.
Anyone on the need of SSL (nowadays TLS) will benefit from this article but particularly will do those in the use of a CMS such as Drupal or WordPress. Although these are not the only ones. If you are in the need of a secure encrypted connection from your browser to a server for monitoring purposes this guide will also be helpful and complementary to your setup.
If you find the articles in Adminbyaccident.com useful to you, please consider making a donation.
Use this link to get $200 credit at DigitalOcean and support Adminbyaccident.com costs.
Get $100 credit for free at Vultr using this link and support Adminbyaccident.com costs.
Mind Vultr supports FreeBSD on their VPS offer.
Before we dig deep in how to enable SSL on Apache let’s clarify some issues. OpenSSL is a software library (a program) used to secure communications between computers. It accomplishes its goal with the help of crytography. This software receives contributions from many parties and as such it is susceptible to bloating and issues of other kinds if not well maintained. As it also happens with OpenSSH or sudo monocultures can lead to great problems since everyone is using the same. On 2014 a critical issue called Heartbleed was found and later corrected. Other TLS implementations didn’t suffer from this issue however almost everybody used OpenSSL and this made it a big deal. Folks at the OpenBSD camp (another flavour of BSD focused on security and good code) started looking at the library and thought of either “repair” OpenSSL or rebuilt it from scratch. A few weeks later they had literally removed several thousand lines of code which was not useful. The fork had began and it’s now called LibreSSL. FreeBSD still comes out using OpenSSL as the default. We’ll use this on this guide but the main principles behind what’s written apply almost everywhere.
The second important topic to mention is, aside from using a program to create the certificates we need to be aware of certificate authorities (CA’s from now on). These are entities which validate and also can emit certificates stating some website using those certificates is really that website. Just lately the browsers have started to mark plain http (instead of https) as insecure but banks did make use of https a long time ago. Anyone could build a fake website which looked as any reputable bank and get user names and passwords from folks willing to see their accounts or transfer money. CA’s provided the tools and the mechanisms to ensure the site you were visiting was indeed the real one. This is nowadays practice but since the main browsers were about to mark almost all http content as insecure (specially the sites which have log in options) a new CA sprang out. It’s called Letsencrypt. Its use is free so you can get certificates at zero cost. I have even written a short guide on how to manually update them on FreeBSD. As already mentioned before certificates do not only validate the site’s legitimacy but also provide encryption in between the parts which mean no one, even someone in the middle of the communication, can read or mess around with the messages involved.
For our use case we’ll emit certificates for our own particular web server. Our browser will surely complain about those certificates since they are not stored into the browser’s database of good and valid certificates coming from valid CA’s. We can also become our own CA and emit certificates for us and our own use, but that not only requires a complete and complex guide out of the scope of this guide but is also something you may avoid for simple use. I may write a complete guide in the future but it’s not even planned now.
The first step to enable SSL on Apache is creating the certificates. We become the root user and then we write the following commad to generate a key. With this key we will then sign one certificate for our use.
Disclaimer:
This openssl key generation doesn’t work on 2021. This comes straight from the FreeBSD’s handbook which hasn’t been yet updated, February 2021. To get self-signed keys and certs use the following command and adjust the output path:
# openssl req -x509 -nodes -days 365 -newkey rsa:2048 -keyout /usr/local/etc/apache24/server.key -out /usr/local/etc/apache24/server.crt
You can still read what is here and adjust it to your needs. Again, to generate certs and keys use the above command.
From the oudated handbook:
root@wptest:~ # openssl genrsa -rand -genkey -out cert.key 2048
0 semi-random bytes loaded
Generating RSA private key, 2048 bit long modulus
.....................................................+++
...................................+++
e is 65537 (0x10001)
root@wptest:~ #
We have just created the key so we move to creating and signing the certificate. Once we send the command out we will be asked a series of questions. Answer them to fit your needs.
root@wptest:~ # openssl req -new -x509 -days 365 -key cert.key -out cert.crt -sha256
You are about to be asked to enter information that will be incorporated
into your certificate request.
What you are about to enter is what is called a Distinguished Name or a DN.
There are quite a few fields but you can leave some blank
For some fields there will be a default value,
If you enter '.', the field will be left blank.
-----
Country Name (2 letter code) [AU]:ES
State or Province Name (full name) [Some-State]:Barcelona
Locality Name (eg, city) []:Barcelona
Organization Name (eg, company) [Internet Widgits Pty Ltd]:WPTest
Organizational Unit Name (eg, section) []:Operations
Common Name (e.g. server FQDN or YOUR name) []:Albert
Email Address []:[email protected]
root@wptest:~ #
Where are the key and the certificate? Here:
root@wptest:~ # ll
total 41
-rw-r--r-- 2 root wheel 957 Jul 21 2017 .cshrc
-rw------- 1 root wheel 520 Jan 3 18:37 .history
-rw-r--r-- 1 root wheel 149 Jul 21 2017 .k5login
-rw-r--r-- 1 root wheel 295 Jul 21 2017 .login
-rw------- 1 root wheel 125 May 13 13:34 .mysql_history
-rw-r--r-- 2 root wheel 249 Jul 21 2017 .profile
-rw------- 1 root wheel 1024 May 13 22:29 .rnd
-rw-r--r-- 1 root wheel 1448 May 13 22:31 cert.crt
-rw-r--r-- 1 root wheel 1675 May 13 22:29 cert.key
root@wptest:~ #
If you don’t like them here you can move them around and place them for example at this path: /etc/ssl. But you can also move them into the Apache’s configuration directory and create a new ssl.
root@wptest:/usr/local/etc/apache24 # mkdir ssl
root@wptest:/usr/local/etc/apache24 #
We now copy the key and the certificate to the just recently created path. Later on we will make use of this path to configure Apache properly to use them.
root@wptest:/usr/local/etc/apache24 # cp /root/cert.crt /usr/local/etc/apache24/ssl
root@wptest:/usr/local/etc/apache24 # cp /root/cert.key /usr/local/etc/apache24/ssl
root@wptest:/usr/local/etc/apache24 # ll /usr/local/etc/apache24/ssl
total 9
-rw-r--r-- 1 root wheel 1448 May 13 23:13 cert.crt
-rw-r--r-- 1 root wheel 1675 May 13 23:13 cert.key
root@wptest:/usr/local/etc/apache24 #
Now that we have the key and the certificate in order to enable SSL on Apache we need to configure Apache itself. We will first edit the main configuration file sitting at /usr/local/etc/apache24/httpd.conf and we will write a small file into the modules directory where we will stablish the port, the accepted protocols, the cipher suite and a couple of other settings.
We look for the module entry in the httpd.conf file:
albert@wptest:~ % cat /usr/local/etc/apache24/httpd.conf | nl -ba | grep mod_ssl
147 #LoadModule ssl_module libexec/apache24/mod_ssl.so
529 # but a statically compiled-in mod_ssl.
albert@wptest:~ %
So we find that at line 147 there sits our module directive and since it has the “#” symbol behind it is disabled. To enable SSL on Apache we have to remove this “#” from the beginning of this directive.
albert@wptest:~ % sudo vi +147 /usr/local/etc/apache24/httpd.conf
#LoadModule session_dbd_module libexec/apache24/mod_session_dbd.so
#LoadModule slotmem_shm_module libexec/apache24/mod_slotmem_shm.so
#LoadModule slotmem_plain_module libexec/apache24/mod_slotmem_plain.so
LoadModule ssl_module libexec/apache24/mod_ssl.so
#LoadModule dialup_module libexec/apache24/mod_dialup.so
#LoadModule http2_module libexec/apache24/mod_http2.so
albert@wptest:~ %
So now if we look for this again we’ll see in the output of the command there is no “#”.
albert@wptest:~ % cat /usr/local/etc/apache24/httpd.conf | nl -ba | grep mod_ssl
147 LoadModule ssl_module libexec/apache24/mod_ssl.so
529 # but a statically compiled-in mod_ssl.
albert@wptest:~ %
We can now move to the modules.d directory and write a file to state the port, the protocol and so on.
albert@wptest:/usr/local/etc/apache24/modules.d % sudo vi 020_mod_ssl.conf
Listen 443
SSLProtocol ALL -SSLv2 -SSLv3
SSLCipherSuite HIGH:MEDIUM:!aNULL:!MD5
SSLPassPhraseDialog builtin
SSLSessionCacheTimeout 300
:wq
albert@wptest:/usr/local/etc/apache24/modules.d %
We have now enabled SSL on Apache but there is nothing pointing our site to the key or certificate we’ve just created. There comes in the virtualhost configuration file. You have to move into the following path /usr/local/etc/apache24/extra and list the content. You will find there a file called httpd-vhosts.conf. This is the default content on it:
albert@wptest:/usr/local/etc/apache24/extra % cat httpd-vhosts.conf
# Virtual Hosts
#
# Required modules: mod_log_config
# If you want to maintain multiple domains/hostnames on your
# machine you can setup VirtualHost containers for them. Most configurations
# use only name-based virtual hosts so the server doesn't need to worry about
# IP addresses. This is indicated by the asterisks in the directives below.
#
# Please see the documentation at
# <URL:http://httpd.apache.org/docs/2.4/vhosts/>
# for further details before you try to setup virtual hosts.
#
# You may use the command line option '-S' to verify your virtual host
# configuration.
#
# VirtualHost example:
# Almost any Apache directive may go into a VirtualHost container.
# The first VirtualHost section is used for all requests that do not
# match a ServerName or ServerAlias in any <VirtualHost> block.
#
<VirtualHost *:80>
ServerAdmin [email protected]
DocumentRoot "/usr/local/docs/dummy-host.example.com"
ServerName dummy-host.example.com
ServerAlias www.dummy-host.example.com
ErrorLog "/var/log/dummy-host.example.com-error_log"
CustomLog "/var/log/dummy-host.example.com-access_log" common
</VirtualHost>
<VirtualHost *:80>
ServerAdmin [email protected]
DocumentRoot "/usr/local/docs/dummy-host2.example.com"
ServerName dummy-host2.example.com
ErrorLog "/var/log/dummy-host2.example.com-error_log"
CustomLog "/var/log/dummy-host2.example.com-access_log" common
</VirtualHost>
albert@wptest:/usr/local/etc/apache24/extra %
Before we do anything with this file we have to enable it by editing the main configuration file. We will look for the file first to discover at which line it sits.
albert@wptest:/usr/local/etc/apache24/extra % cat httpd.conf | nl -ba | grep httpd-vhosts.conf
508 #Include etc/apache24/extra/httpd-vhosts.conf
albert@wptest:/usr/local/etc/apache24/extra %
We now edit it:
albert@wptest:/usr/local/etc/apache24/extra % sudo vi +508 httpd.conf
Before editing:
# Virtual hosts
#Include etc/apache24/extra/httpd-vhosts.conf
After editing:
# Virtual hosts
Include etc/apache24/extra/httpd-vhosts.conf
We now edit the httpd-vhosts file in the right path so your site has the right input to spit out the content you put in it. The virtual host file is quite self explanatory as you can read. This is the result of our simple editing to enable SSL on Apache:
<VirtualHost *:80>
ServerAdmin [email protected]
DocumentRoot "/usr/local/www/apache24/data/"
ServerName localhost
ServerAlias 192.168.1.242
ErrorLog "/var/log/wptest-error_log"
CustomLog "/var/log/wptest-access_log" common
</VirtualHost>
<VirtualHost *:443>
ServerAdmin [email protected]
DocumentRoot "/usr/local/www/apache24/data/"
ServerName localhost
ServerAlias 192.168.1.242
SSLEngine on
SSLCertificateFile "/usr/local/etc/apache24/ss/cert.crt"
SSLCertificateKeyFile "/usr/local/etc/apache24/ssl/cert.key"
ErrorLog "/var/log/wptest-error_log"
CustomLog "/var/log/wptest-access_log" common
</VirtualHost
We check everything is fine:
albert@wptest:/usr/local/etc/apache24/extra % apachectl configtest
Performing sanity check on apache24 configuration:
Syntax OK
albert@wptest:/usr/local/etc/apache24/extra %
And since the syntax is ok it’s now time to restart Apache to enable the changes.
albert@wptest:/usr/local/etc/apache24/extra % sudo apachectl restart
Performing sanity check on apache24 configuration:
Syntax OK
Stopping apache24.
Waiting for PIDS: 1923.
Performing sanity check on apache24 configuration:
Syntax OK
Starting apache24.
albert@wptest:/usr/local/etc/apache24/extra %
Now that everything is fine you should point your browser to the address or domain you own and the result should be… dramatic. This is the case because as we explained before your certificate is not recognised as a good one by your browser. This is why you see “Your connection is not secure”. Don’t panic unless you’re willing to use this certificate for others. This is just for your own use, private, not public. If you need a public one, get one from Letsencrypt (out of the scope of this article).
The browser panicking:
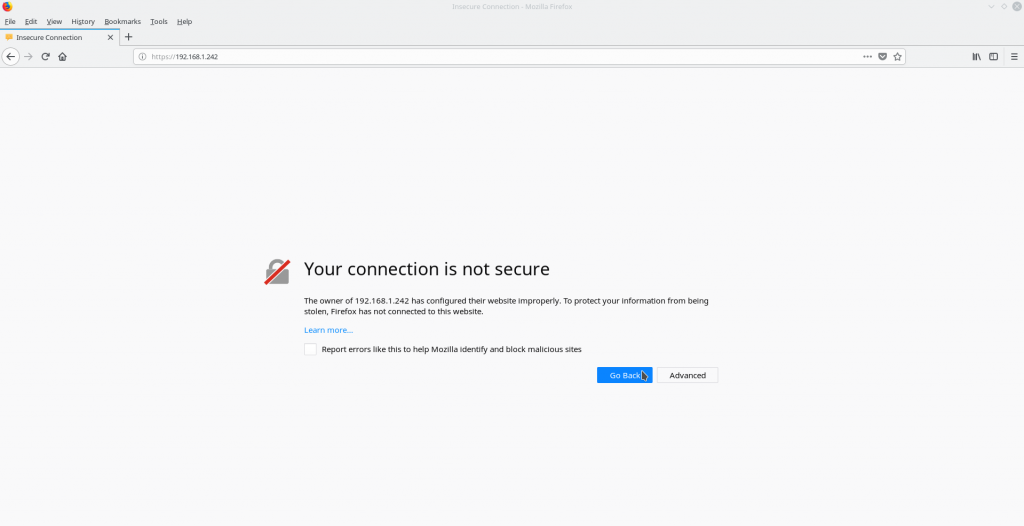
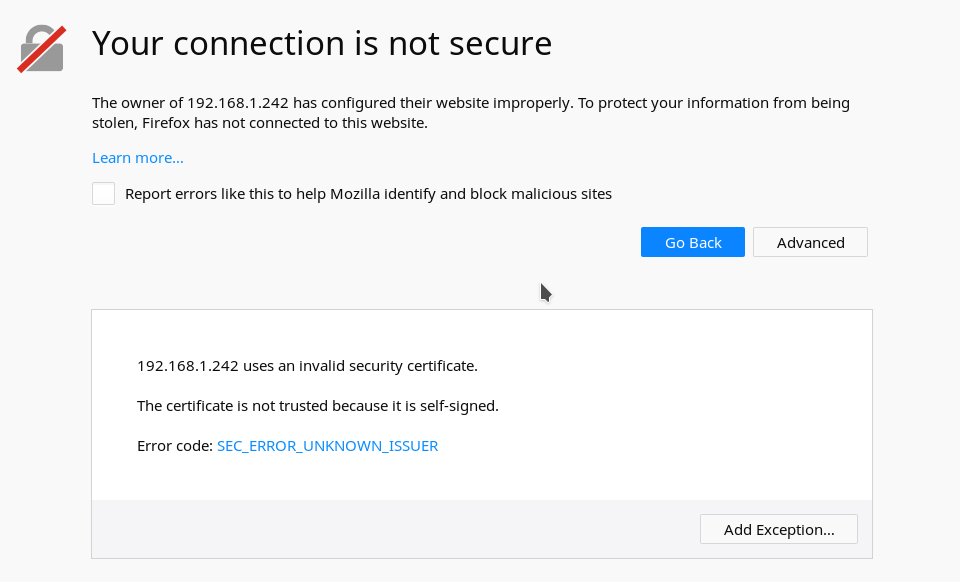
Now click on advanced. A new box has opened and now you can see a dialogue where you can click and add an exception. Add it please.
When you click on add exception a new browser window appears, a small one and you can there do several things. Make sure the tick that says “Permanently store this exception” is ticked so your browser stores this as a good certificate. Mind after 365 days it will expire.
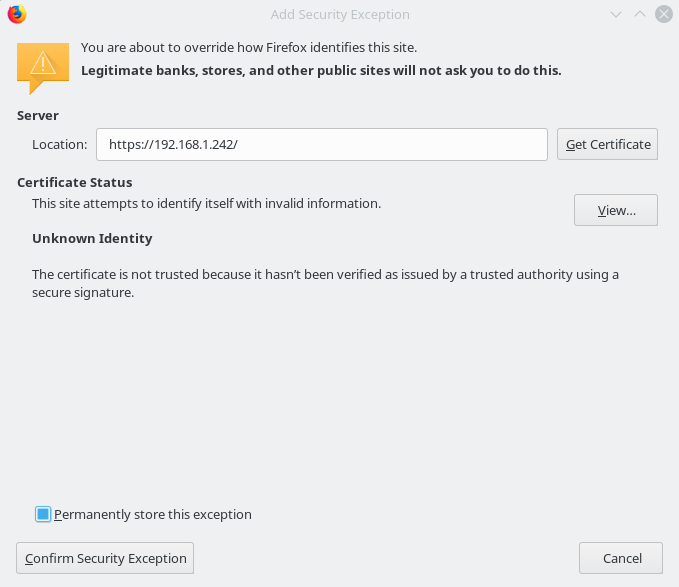
Of course click on “Confirm Security Exception”. Your browser will now point you to the website you were willing to visit but in a secure manner.
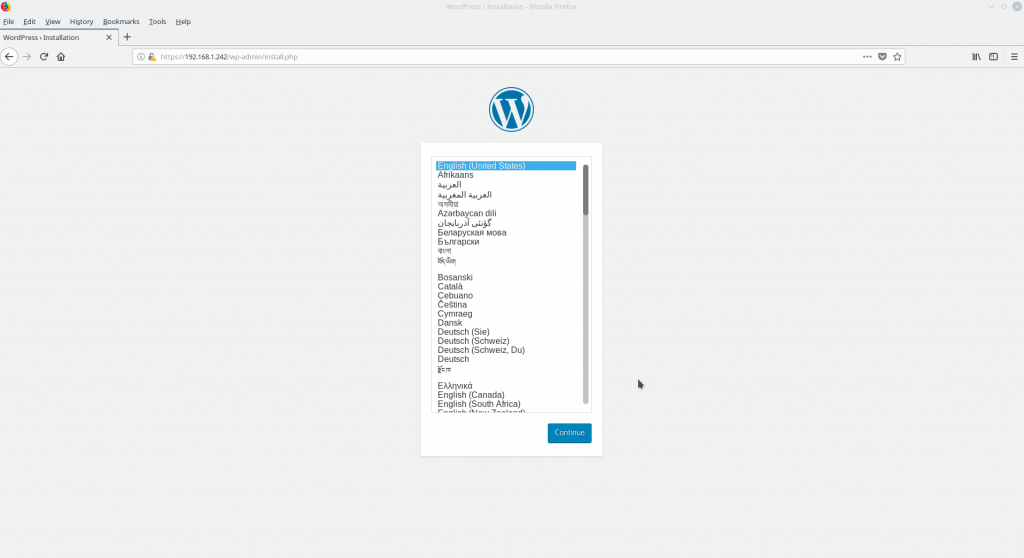
In my case I was not only doing a how to enable SSL on Apache, but I was also writing an article on how to access and administer WordPress using a secure connection.
We can take a look at our own certificate. Click on the url box at the yellow warning. Then click on the arrow on your right and ask for more information (at the very bottom). A new browser window will appear.
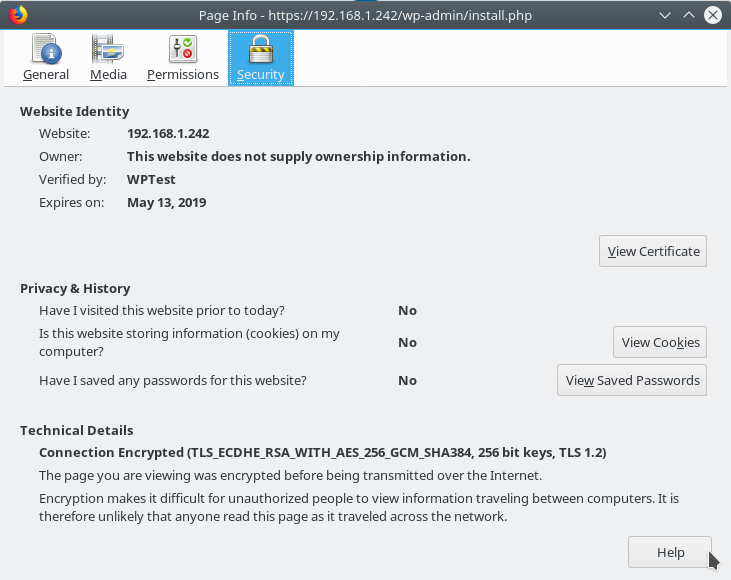
If you click on “View Certificate” you can see it and it will be somewhat familiar to you.
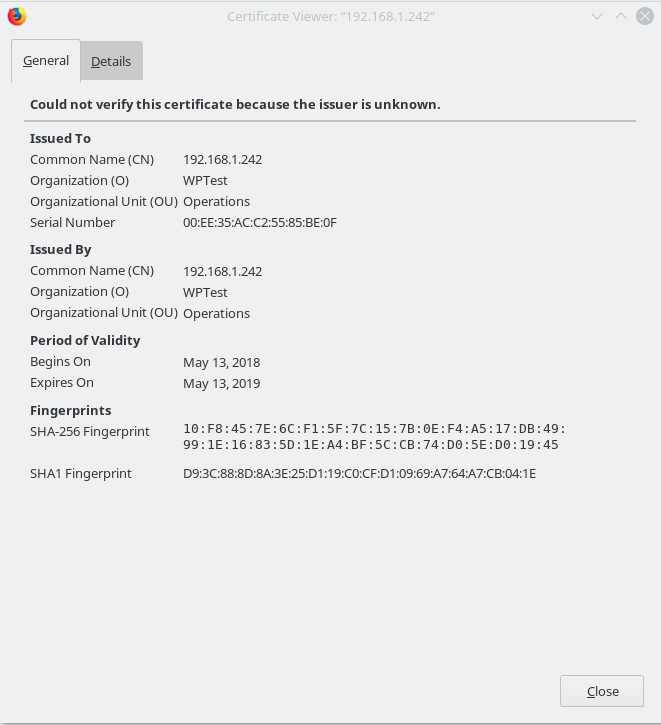
This is all on how to enable SSL on Apache on FreeBSD. But using self signed certificates.
If you find the articles in Adminbyaccident.com useful to you, please consider making a donation.
Use this link to get $200 credit at DigitalOcean and support Adminbyaccident.com costs.
Get $100 credit for free at Vultr using this link and support Adminbyaccident.com costs.
Mind Vultr supports FreeBSD on their VPS offer.
If you need to use LetsEncrypt for your site use one of my tutorials at DigitalOcean.