Being a fan and heavy user of FreeBSD jails, I’ve been using iocage for years now. However, iocage is not the only tool capable of making abstractions on top of the jail infrastructure in FreeBSD to make it easier to manage in a not just easier way, but quicker, centralized manner. Bastille is the other tool of choice for many FreeBSD users and it is also capable to import iocage jails to Bastille. This is a quick guide on how to do just that.
If you find the articles in Adminbyaccident.com useful to you, please consider making a donation.
Use this link to get $200 credit at DigitalOcean and support Adminbyaccident.com costs.
Get $100 credit for free at Vultr using this link and support Adminbyaccident.com costs.
Mind Vultr supports FreeBSD on their VPS offer.
Requirements:
- A system with iocage installed on it. More of that in this article.
- A system with bastille installed on it. More on that in this other article.
- Some command line administration knowledge.
- Patience.
Synopsis.
In this article I will describe the process of importing an already existing jail constructed using iocage. It assumes the reader has some FreeBSD knowledge and some iocage knowledge too.
The process can be described as exporting the jail from an iocage equipped system, copy it into the same system but into bastille’s structure or to a system equipped with bastille only. Then, the jail can be imported by bastille to later be finally configured manually if needed (e.g. network device config).
Step 0. Export the jail from the iocage system.
The first thing we need to do to import iocage jails to Bastille is extracting the jail out of the iocage running system. To accomplish that we need to stop the jail running and then export it. This can take from just a few minutes to a long hour or more depending on how much space is that jail taking on disc. Act accordingly.
To stop the jail, issue this next command:
$ sudo iocage stop <JAILNAME>
Once the jail is stopped, we can start exporting it.
$ sudo iocage export <JAILNAME>
This export action will create a .zip file inside the /zroot/iocage/images/ directory.
$ ls -al /zroot/iocage/images/
As the output, we should see the .zip file from the previous export.
Now, we can use this same zip file to be imported by bastille. We can either choose to use the same system with both tools installed (iocage and bastille), or one on each system and copy them via zfs send or ssh.
Step 1.- Import the jail to bastille.
This is the main point in this how to import iocage jails to Bastille on FreeBSD. Bastille, as iocage, has an export but also an import option. The only thing here is we need to place the .zip file from iocage to a specific location in the directory structure. Then we will import it using bastille.
As it can be seen below, we’ve pulled an image, a .zip file, from an already existing iocage system.
![]()
To place the .zip file we can either copy the file, or even better, move it from the current location to its destination.

As it can be seen the file has been moved into the backups folder in bastille. The ownership has also been slightly altered, so root is now the owner and not my username.
Now, let’s tackle the import, finally. We will issue this next command.
$ sudo bastille import /usr/local/bastille/backups/filename.zip

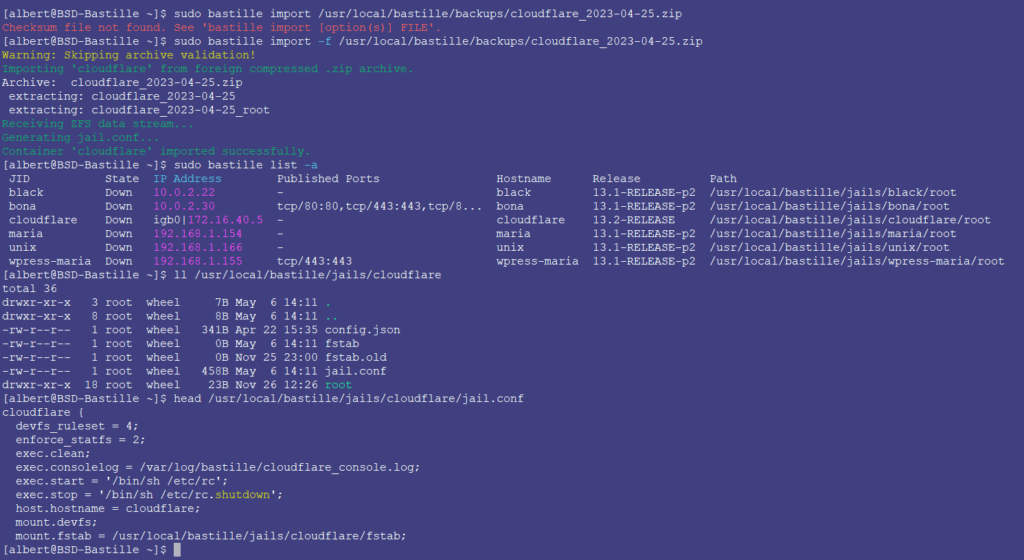
Ideally, as you can see in this terminal capture, we should have not only imported the .zip file from the iocage export, but the checksum iocage produces to provide an integrity check over the .zip file. If we, for whatever the reason haven’t imported that checksum file along the original compressed exported jail file, with option -f we can import the jail anyways.
To confirm the jail has been imported we can issue the list subcommand for bastille.

We are not finished yet. The jail was configured on a different system, with different networking settings. We need to make adjustments to that before starting up the recently imported jail.
Step 3.- Adjust the jail configuration.
This is another, very important step, in this how to import iocage jails to Bastille guide. The jail.conf file for the cloudflare named jail contains the network settings used in the previous system.
/usr/local/bastille/jails/cloudflare/jail.conf
This needs to be adjusted and reconfigured to adapt it into the receiver one.

As it can be seen in the image above, in the top half of the terminal capture we can see the network configuration inside the jail.conf file for the cloudflare jail. However, the current system’s network interface and address are quite different. The network configuration now has to be modified and match the receiving system.
This is how the jail.conf file corresponding to the cloudflare jail looks now.

Now that we have exported the jail from the iocage system, imported into bastille, and adjusted the configuration bits necessary to work on the new host, we can fire up the jail.
Step 4.- Start up the jail in bastille.
The easiest step in this how to import iocage jails to bastille on FreeBSD guide. To start up the jail in bastille we only need to issue this command.
$ sudo bastille start <JAILNAME>

And there it is listed, up and running.
![]()
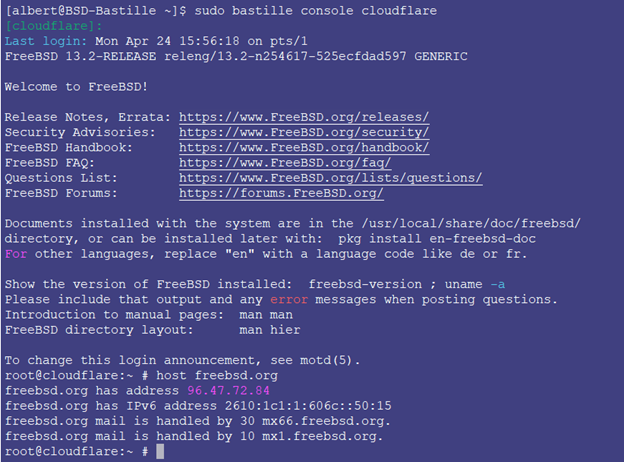
You can now start using the jail as intended. Test routing, dns resolution, etc to make sure everything has been correctly done, but you surely should be able to use this iocage constructed jail in bastille.

Conclusion
Bastille is quite similar in terms of use and name conventions for subcommands to iocage. However, they have been constructed very differently. Iocage was built around the python programming language, whereas bastille has been built using plain shell scripts. Since the underlayer technology both are leveraging is FreeBSD Jails, the end result is quite similar.
I hope this helps anyone willing to use both tools interchangeably and use old iocage jails in Bastille without a hassle.
Thanks for reading this how to import iocage jails to Bastille on FreeBSD 13 guide.
If you find the articles in Adminbyaccident.com useful to you, please consider making a donation.
Use this link to get $200 credit at DigitalOcean and support Adminbyaccident.com costs.
Get $100 credit for free at Vultr using this link and support Adminbyaccident.com costs.
Mind Vultr supports FreeBSD on their VPS offer.